Setting up ROBOTC to make use of the Driver Suite is a fairly painless exercise. This small tutorial will take you through it step by step.
Prerequisites
You need to have ROBOTC already installed on your system. This tutorial assumes you have at least 3.55 Beta 2 installed. You also need to download the Driver Suite, which you can do here: [LINK].
Step 1: Unzipping the Driver Suite
Double click on the zip file containing the Driver Suite and extract it to the folder of your choosing. In this example, we’re unzipping it to a folder on the C: drive called Programming. You can make it whatever you like, as long as you remember what it was for step 2.
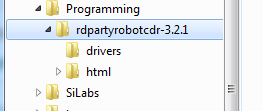
Unzipping it will create a folder structure like the one below:
Obviously, the version (3.2.1 in this picture) may be different for you, if you’ve downloaded a later version.
Step 2: Configuring ROBOTC include folders
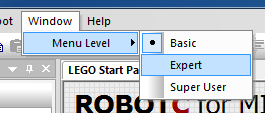
To configure ROBOTC we need to first set the menu level to “Expert. You can access this through the “Window” menu entry:
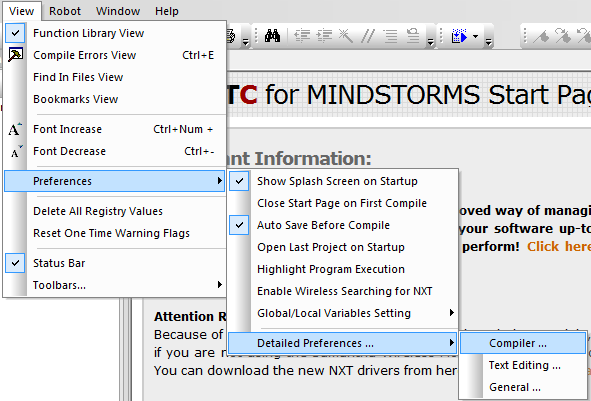
Now we can access the more advanced preference options we’ll need to setup the include directories. Navigate to “View->Preferences->Detailed Preferences->Compiler”.
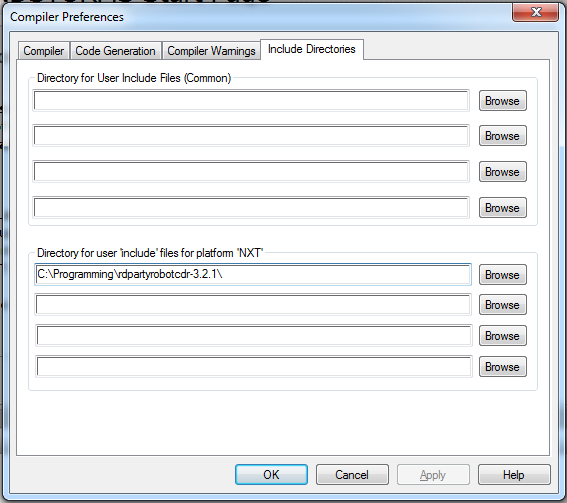
A dialog box will open, click on the “Include Directories” tab. Now click on the “Browse” button in the NXT platform section (bottom half), this will open a file dialog box.
Navigate to the folder that the driver suite expanded to. In my case this was “C:\Programming\rdpartyrobotcdr-3.2.1”. Click OK. Now your screen should look like this:
Click OK to exit this. You’re now all done with setting up the include folders. Next step are the sensor types.
Step 3: Configuring ROBOTC Sensor Types
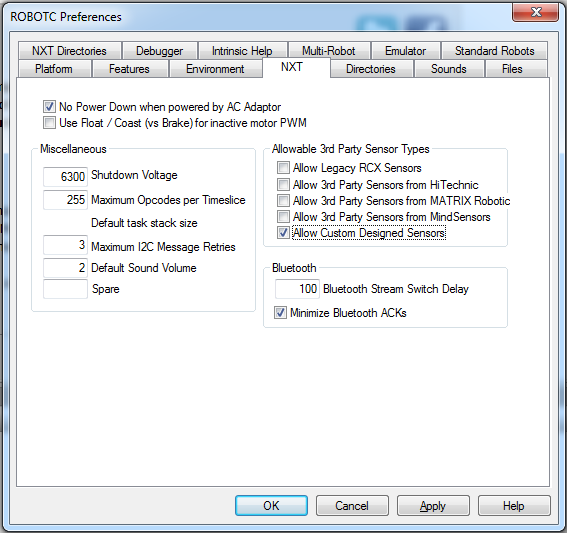
Open the general preferences through “View->Preferences->Detailed Preferences->General”. Click on the “NXT” tab. In the Allowable 3rd Party Sensor Types, make sure you enable “Allow Custom Designed Sensors”. You can select the others, if you want, but you don’t need them to use the Driver Suite. Click “OK” to complete the process.
Congratulations, you’re now good to go!
Step 4: Testing your installation
Create a new ROBOTC file and save it as “drivertest.c”
Enter the following text into the file:
#include "drivers/hitechnic-irseeker-v2.h"

task main()
{
    // do nothing really interesting
}
Hit the F7 button to compile. ROBOTC should compile the program without an error. If it does, recheck the path you configured in Step 2.
 Bot Bench I'd Rather Be Building Robots



This works perfectly for my NXT, but if I choose in platform type the EV3, then the compiler gives a whole list of errors in the common.h file.
For the EV3, you should be using the driver suite here: https://github.com/botbench/robotcdriversuite