 What is nicer than attaching a Sharp IR sensor to your NXT? Attaching 8 of them, of course. That is what my friend Helmut wanted to do with his NXT. Unfortunately, as good a programmer as he might be, messing around with electronics just wasn’t his “Tasse Tee” (that is cup of tea for you non-German speaking folks).
8 Sharp IR sensors consume a lot of power, much more than the NXT could ever hope to supply without frying. A single sensor can easily draw up to 40mA, so 8 of them is 320mA, almost 4 times as much as the all the sensor ports can supply, put together! An external power supply would be necessary. A way to enable and disable sensors on an individual bases would be very useful, too.
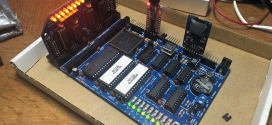
 Thus was born “MightyBoard”. At the heart of the board are 2 ICs, the MAX127, an 8 channel 12bit ADC, and an MCP23008, an 8 channel IO chip. Both these chips can talk I2C and are therefore ideal to connect to the NXT. The ULN2803A merely acts as a buffer for the MCP23008. I added some green LEDs so that it was easy to see when a channel was enabled.
I prototyped the whole thing on 3 breadboards but to cut down on the wires and mess, I only made it work for 4 channels. It was for proving a concept, rather than duplicating the whole thing. Below is a short video of one of the first tests.
Next was the hard part, making a permanent copy of the whole thing. I chose to use copper strip board, the 3 hole per strip kind. They’re fairly easy to use and you almost never have to manually cut any of the strips. I used a cut up conducting flat strip of Lego as a connecting point for the Lego battery holder. I soldered some pins into the back of it and then super glued it to the board to stop it from ever moving again. The small dual DIP switch is to allow the pull-up resistors to be disabled. This is necessary if the second sensor looped through is a Lego sensor. They have the pull-ups already built in.
To prevent the mess of wires from being ripped off, I used a whole bunch of hot glue and the plastic from a DVD cover box. It really did the trick and made the board rather “professional” looking, even if I do say so myself. I used a box cutting knife to trim the blobs off the side.
Below is the video of the first test I did with the final version of the MightyBoard. As you can see, it worked rather well.
MAX127 8 channel 12 bit ADC with I2C interface
ULN2803A Darlington transistor array
MCP23008 8-Bit I/O Expander with I2C interface
C1..C8 0.1 uF capacitor
R1..R8 1kOhm resistor
D1..D8 green 3mm LED
CON0..CON8 3 pin connector
C9 0.01 uF capacitor
C10 4.7 uF capacitor
J1, J2 NXT connector
R1..R8 1kOhm resistor
R9, R10 82kOhm resistor
SW1 double DIP switch
You can download the latest version of the RobotC drivers for this board here: [LINK].
Have fun and remember, if you blow it up, don’t blame me!
 Bot Bench I'd Rather Be Building Robots


Nice work Mightor and very neat!