 Bot Bench I'd Rather Be Building Robots
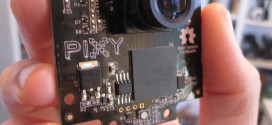
 The HiTechnic IR Link is capable of many things including controlling your Power Function devices. The one thing you couldn’t do was transmit regular data. That is, until now.
The IR Link has several transmission modes, 0x02 for example is used for the PF functionality. There is another mode 0x00, UART-mode, which can be used to transmit 8 bytes at a time at 2400 baud using a 38KHz carrier frequency. It is also the mode that can be used for communicating with the RCX.
There are two ways you can use the IR Link to transmit your data. The first method which can be used to send the same 8 bytes over and over again works by preloading the transmit buffer at 0x45 with the 8 bytes you wish to send, followed by the total message length (0x08) and the transmission mode to be used (0x00). You can then trigger the IR Link to start transmitting by setting register 0x4F to 1 with another I2C message. Care must be taken not to trigger a retransmission before the previous one is done or you’ll garble the currently transmitting message as it will immediately start transmitting from the first byte again.
If you don’t want to send just 8 bytes over and over again, you can also load up the transmit register at 0x45, followed by the message length (0x08), transmission mode (0x00) and the trigger (0x01).
Due to the nature of UART-mode, the bytes are transmitted UART-style with odd parity. That means that when you tell the sensor to transmit 0xAB (b10101011), the following is transmitted via IR:
| Start | B0 | B1 | B2 | B3 | B4 | B5 | B6 | B7 | Par | Stop |
| 1 | 0 | 0 | 1 | 0 | 1 | 0 | 1 | 0 | 0 | 0 |
Each data byte is preceded by a start bit which is always set to 1, then follows bits 0 through 7 of your data (least significant bit first), inverted (0 becomes 1, 1 becomes 0), the odd parity value and then a stop bit which is always 0. Sounds complicated? I agree, it took several edits of this blog entry to get this right!
For each bit set to 1, the IR Link’s transmitter goes high for 1/2400th of a second or about 0.42ms, that means that 2 consecutive bits set to 1 will mean an IR burst of a little more than 0.83ms.
There is a gotcha with the IR Link’s transmission buffer; its start register is counted backwards from 0x4D. That means that if you have an 8 byte message to send, the first data byte starts at 0x4D-0x08 = 0x45. So if you want to transmit the above sequence, you’ll have setup the IR Link’s buffer such that it looks like this:
| Reg | 0x45 | 0x46 | 0x47 | 0x48 | 0x49 | 0x4A | 0x4B | 0x4C | 0x4D | 0x4E | 0x4F |
| Data | 0xCC | 0x76 | 0x66 | 0xFF | 0xCC | 0x00 | 0xAB | 0xAA | 0x08 | 0x00 | 0x01 |
Where:
0x4D is the number of bytes to be transmitted
0x4E is the transmission mode
0X4F is the transmission trigger
You will nee to skip the transmission trigger (0x4F) if all you want to do is preload the transmission buffers.
Please note that there is no way for the IR Link to know if transmission was successful. An easy way to check if your IR Link is sending *any* IR signals is to point it at a digital camera and look through the viewfinder. The IR light should appear as a dot the small screen on the front of the sensor. Most digital cameras are extremely sensitive to IR light. This is also a good way to check if your TV remote is still working!
I’ve included two NXC programs, one which transmits the same message over and over again as fast as possible, the other sends a single message every 50ms.
| IR Beacon: | [LINK] Generates 1200Hz IR signal, can be used with IR Seeker V2 |
| IR Messenger: | [LINK] |
The functionality to send messages via IR will be included in the next release of the 3rd Party RobotC Driver Suite, so I didn’t include any here.


Yay! NXT-RCX communication outside of NXT-G. (There are probably drivers for NXC that I didn’t see, but this should work…) Now to figure out how to send IR messages from the RCX to the NXT. (Technicaly, for RCX to NXT one-way communication, we could use the light sensor, just like with the camera.)
Oh yeah… frequency of transmission is greater than 1 kHz…nevermind on the light-sensor idea…it can still be used like the ultrasonic sensor to determine distances…if you haven’t already, could you try to get the IRlink to work for recieving messages from the RCX? (The way the default firmware permits? With values between 0 and 255)
At the moment I am working on other projects so this will have to wait, unfortunately. When I get some time again, I’ll add this stuff to the driver suite.
Regards,
Xander
hmm.. interesting. Coincidentally UART and I2C are covered in the last few lectures for my embedded systems class. haha. Though this is a much more interesting way of learning.
[…] how does it work? Well, remember I mentioned a few articles back how you could turn an IR Link into a beacon by pulsing it at 1200Hz? Well, […]
I was wondering if anyone has figured out how to use the irlink sensor to receive data from the rcx tower? I am trying to configure the NXT to work with the battlebricks program.
Thanks,
Mark
I managed to make it work, up to a point. If you look at my driver HTRCX-driver.h you will see a HTRCXreadResp() function.
Will the HTRCX-driver.h driver work with NXC? Where can I download it?
Thanks
No, this is for ROBOTC only. There is a nice RCX communications API in NXC already.
Will it work with the irlink sensor? What is it called?
Thanks
Download this PDF and search for functions starting with HTRCX. http://bricxcc.sourceforge.net/nbc/nxcdoc/NXC_Guide.pdf
I have never used these functions.
Fantastic! This looks like it may do exactly what I need it to do.
Thanks much!
Hi Xander,
I looked at all the API functions in the guide and can’t find anything that allows data to be read from the irlink sensor. Any other suggestions?
Thanks
I would suggest you ask on the Mindboards forums, perhaps someone there is better able to help you. You can find the forums here: http://sourceforge.net/apps/phpbb/mindboards/
Thanks
is it possible to get the link to send a signal to interfere with Airhogs IR controled helicopter
That depends on the protocol used by the Airhogs helicopter 🙂 If it is RC5 (as used by TV remotes, etc) then probably not but you may be able to get close enough for it to work. You can find out the signals by hooking up an IR receiver to a scope or protocol analyser and checking out the pulses as you press the buttons on the remote control.
Edit: Ah I misread your message. It may be fine to interfere with the signal, depends on how it is modulated, though.
¿can be used by a EV3 brick? thanks for the answer 🙂
I have not tested it with the EV3, but I see no reason why it wouldn’t.
thank you for putting all this together! really awesome.
I have at irlink and a PF train I’m trying to control /w an Ev3. what I noticed right away is the range is very short and the IRlink needs to be pointed right at the receiver, and so I can not reach the entire track. I would like to send the command to ‘go’ and then have the train stop either when it gets back in range or most like via another sensor like the color sensor. What I noticed is that the train stops as soon as it’s out of range though. Is it possible to send ‘go’ and then it keep going? I noticed with the regular PF remote I can do this, so I would think it should be possible. (I’m still learning the transmission protocol so sorry about my lack of knowledge)
Hey there,
The mode you’re looking for is called “Single Pin Output Mode”, you can easily control the motors using
void PFMotor(tPFmotor pfmotor, ePWMMotorCommand _motorCmd);Have a look at hitechnic-irlink-test1.c to see how to use it.
= Xander