 Bot Bench I'd Rather Be Building Robots

What is VEX IQ
 VEX IQ is the latest offering from VEX. It’s a complete modular robotics system to complement their VEX Cortex range. The VEX IQ is positioned at a younger audience, from the age of about 8. It uses plastic parts instead of the Cortex metal parts. Using pins, plates and connector pieces, it is easy to build a robot quickly.
The VEX IQ system has a brain and sensors, connected by cables. It is remotely controllable using a joy pad which communicates over either 900MHz (for US) or 2.4GHz (for the rest of the world). The brick has an easy to remove battery pack that slides out the side. This makes it very easy to build your brain into the robot and not needing to remove it completely to replace it. The battery cannot be charged in place, but the kits all come with a charger. Replacement or additional batteries are super cheap, at around $20 US.
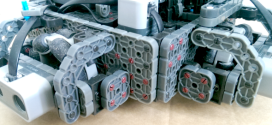
The VEX IQ brain has 12 ports, which can be used to connect and control either motors or sensors. It uses auto-identification to determine what’s connected to the port. The communication uses industry standard I2C. Each sensor and motor is “smart”, meaning it has an MSP430 processor on board that does all the heavy lifting. For example, the brain can simply tell a motor to move to position 726, at 50% speed and set a flag when it’s done. It’s fire and forget, so to speak. The motors also have proper torque control, it’s possible to specify a maximum amount of current that each motor may consume. I used this feature in my quadruped robot to find the null positions of its legs:
As soon as the motors stall with the low torque setting, the VEX IQ brain is notified and I can switch off the motor and reset the encoder. Pretty useful!
Working with the VEX IQ system is not all that different from other systems currently on the market, so how is it different? One of the main selling points is its affordability. At $299 US for the Super Kit (see image top right), which includes:
- Over 850 Structural & Motion Components
- 4 Smart Motors, 7 Sensors, Robot Brain, Controller & Batteries Included
- Storage Bin & Tray included for organized storage of all parts
it’s a pretty amazing deal. There’s also a charger in the kit. There oodles of expansion sets for this system as well; here are a few of them:
 |
 |
 |
| Competition Add-On Kit | Foundation Add-On Kit | Tank Tread & Intake Kit |
There are tonnes more, which you can see here: [LINK]. You can easily get competition training kits, so you and your team can get ready for the VEX IQ Challenge, a world wide robotics competition, where you and your team’s robotics prowess is put to the test. It’s very easy and cheap to enroll a team, a single team will costs $100 US, with additional teams from the same school costing just $50 US.
I love how incredibly rich the Super Kit is in its range of parts and sensors. It comes with 7 sensors, at least one of each that the VEX IQ system has:
- 1 x Gyro Sensor
- 2 x Bumper Switch
- 2 x Touch LED
- 1 x Distance Sensor
- 1 x Color Sensor
I really like the Touch LEDs; they’re a capacitive touch button, but you can specify the colour they will light up with. This is super useful for displaying the status of your robot, when you’re not able to look at the screen:
Speaking of the screen, the VEX IQ has a beautifully backlit screen, as you can see in the previous video. The resolution may not be very high on it, but I’ll take a backlit screen over a high-res one, any day. The VEX IQ does not give you access to the full screen, but 5 lines of text for displaying information. You can also use this space for drawing on. The area inside the red square is usable by the user:

Since I have no plans to create an arcade game with the VEX IQ, I am not that bothered by this small space.
Building with VEX IQ
So what is it like to build with the VEXC IQ? It’s not that unlike other modular building systems where you click together beams using pins. The VEX IQ system relies very heavily on very wide range of joining pieces, there are more than 10 different types for joining plates and beams, that’s not counting the various pin types that be used as well. I took a time lapse video of me building the standard clawbot.
There are lots of different lengths of beams and plates, as well as beams with a wide range of angles. I would liked to have seen a wider range of cogs, with some free-wheeling ones as well. However, I believe those are coming soon.
It’s very quick to build with the VEX IQ system and it took about 45 minutes or so to build that robot. The colour scheme of the VEX IQ is a little bland, oxblood (like the Dr Martens boots) red with dark grey. They’re coming out with an extended range of colours, including blue cogs and beams in practically every colour of the rainbow, that should liven things up a little!
Programming the VEX IQ
Programming is done with either Modkit, a graphical programming environment, or ROBOTC for VEX. I’m a big fan of ROBOTC, of course and I have not really played with Modkit yet, so my opinion is not going to be very impartial here.
On the left you can see Modkit, which is a web browser based programming environment. It uses an event driven model, which is very different from standard programming. Instead of polling for a device, you instead have a bit of code that responds to a sensor having updated its value.
On the right is ROBOTC, which is a more conventional programming environment. It has a debugger and remote screen ability, which is very useful. You can also keep a close eye on the variables, sensor and motor states.
 |
 |
| Modkit for VEX | ROBOTC 4.x for VEX IQ |
The folks at ROBOTC are also working on a graphical programming environment, which is quite Scratch-esque in how the program is assembled on the screen. I have only played with this a very small amount, but it’s pretty cool:

The graphical programming environment is the first step towards programming in full ROBOTC. Using a translation button, you can convert the graphical code into, what ROBOTC calls, Natural Language. This is a simplified programming language, like a higher level C interface. You can download a copy of the graphical programming environment here: [LINK].
Conclusion
The VEX IQ a great modular robotics system, which is extremely versatile and very affordable. I really enjoyed playing with it and I’ll publish some more of my models as I create them. With the new upcoming wider colour scheme and other minor improvements, this is a modular robotics system that can give the competition a run for its money, at a much more affordable price.


[…] my last post about the VEX IQ building system I had a small video featuring my VEX Quadruped. I’ve done a bit of work on it since then and […]